Monday, May 16, 2011

Make Your Own Pants At Home


To make your pants you’ll need the following:
               A pair of pajama pants or jeans that fit you just right.
               Two pieces of fabric. They need to be 5" taller than your pants and 2" wider than your pants.
               Measuring tape
               Chalk
               Scissors
               Sewing machine or sewing kit
A drawstring or strip of elastic

Step 1. Fold your pants in half, pulling out the crotch seam so that they are completely flat. Make sure that you can see the seam all the way from the ankle to waist on both sides.
how-to_pants_01.jpg 


Step2. Fold your fabric in half, wrong-side out. Lay your pants on the fabric so that the outer seam is lined up with the fold. It is okay if the pants are curved and don't line up perfectly with the fold.
Use your chalk to trace around the edge of your pants. Leave 2" below the ankle and above the waist to allow for hemming. Stay 1/2" away from the edges the rest of the way around.
Repeat this step to make the other side of your pants. Cut each piece around the chalk line. Do not cut the fold of the fabric.

how-to_pants_02.jpg 


Step3. Remember, your fabric should be wrong side out. Start at the crotch and straight stitch all the way to the ankle. Repeat on the other side.
Before you continue, it is important that you zigzag stitch the raw edges. This will keep your pants from unraveling in the washer. It might seem trivial now, but you do not want to skip this bit.

how-to_pants_03.jpg 


Step4. Start at the bottom front of the crotch where the legs meet. Straight stitch from the point up to the waistline. Repeat with the back of the pants, starting at the bottom and stitching to the waist.
Zigzag stitch the raw edges from front to back.
Next, you'll need to add buttonholes for a drawstring, or measure elastic for an elastic waistband.

how-to_pants_04.jpg


Step5. Drawstring: On the front of your pants, measure two inches from the top of the waistline to the center seam. Mark this point. Measure a 1 1/2" out from this point to the right and left. Mark a 1" vertical line on each side, as shown. There should be 3" between each line, and they should be the same distance from the center seam.
Use a buttonhole stitch or the buttonhole setting on your sewing machine to stitch along the vertical chalk lines.
Elastic: For an elastic drawstring, measure around your waist with the measuring tape. Cut a strip of elastic at this length. We will insert it in the next step.
how-to_pants_05.jpg

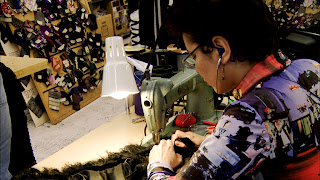
Step6. Zigzag stitch all along the raw waistline.
Fold down the waist 2" to hem. If you put on buttonholes, make sure that you are stitching below these. Straight stitch all the way across. Thread your drawstring easily by attaching a safety pin to the end.
If you are inserting an elastic waistband, straight stitch all the way around until you are 2" from your starting point, leaving an opening to insert the elastic. Use a safety pin to thread your elastic through the opening and all around the waist. Stitch the elastic ends together. Finish stitching the waist closed.
Finally, all you need to do is hem the bottom.
how-to_pants_06.jpg


Step7. Turn your pants inside out and try them on. decide how long you want the pants to be. This is the point where you could chop the legs and make Capri's or shorts at the last minute.
Zigzag the stitch the raw edges of the ankles. Fold in and pin the bottom hem where you want it. Take off the pants and turn them inside out again.
Straight stitch along the hem, a 1/2" away from where your raw edge is. You can also stitch along the bottom of the hem for a finished look. Make sure that you are evenly stitching all the way around the leg
how-to_pants_07.jpg

LOCATION LOCATION LOCATION

The key to a successful business is location. Honestly, I think that the heart of the city (Washington, DC) would be the best place to kick off JICD. Reason one being because its metro accessible. With JICD being located in the city, transportation would never be a conflict for students or potential students with unmade minds. Reason two, DC is our capital and is generally just a "good" location to bloom a business because of the heavy traffic, exposure and easy promotion. With that being said, take a look a some of the potential locations and tell me what you think! Some of these locations are actual buildings that stand alone while others may be a floor within a 10 story building in the city.


630 Eye Street, NW, Washington, DC
http://www.cityfeet.com/Commercial/ForLease/WashingtonDCCommercialRealEstateLocal/630-Eye-Street-Nw-Washington-DC-20001-17024680L2845140L1.aspx


2205 New York Avenue, Washington, DC
http://www.loopnet.com/Listing/16920805/2205-New-York-Avenue-Washington-DC/


500 Twelth St, NW 
A floor within a building
http://www.cityfeet.com/Commercial/ForLease/WashingtonDCCommercialRealEstateLocal/500-Twelth-Street-Nw-Washington-DC-20005-16901521L2742756L1.aspx


1200 G St, NW
A floor within a building 
http://www.cityfeet.com/Commercial/ForLease/WashingtonDCCommercialRealEstateLocal/1200-G-Street-Nw-Washington-DC-20005-16901517L2760057L1.aspx


Steps To Making a Cocktail Dress


1. Choose a dress pattern that you think would make a lovely cocktail dress. You can find cocktail dress patterns from all the major pattern companies, such as Burda, Simplicity, Vogue, McCalls, Kwiksew and New Look, but can also find patterns online, such as those linked in the Resources section of this article. Also, remember that many evening gown and sundress patterns can be altered to fit the look of a cocktail dress, either by shortening the skirt or adding more elegant details.
2. Take measurements of your body at the bust, waist, hip and skirt length, using the measuring tape. Depending on the style of the cocktail dress pattern you have chosen, you may also need to take measurements for the neckline, armhole, upper arm, sleeve length, center front and center back. Using these measurements, determine what size pattern you will need to use. Compare your measurements with the pattern's sizing chart, and choose the measurement that fits the largest part of your torso. You can scale the other measurements down when working with the pattern pieces.


3. Print or remove your pattern pieces from the package, then cut the pieces along the cutting lines for your size. Make sure that you have pieces for the skirt, the bodice, the sleeves and any detail work such as belts and collars. Pin the pattern pieces to your fabric, and cut around the pieces, following all guidelines for the number of pieces to cut and whether or not the pieces are cut on the fold line. Transfer all pattern markings, such as darts, to the fabric using a fabric pencil.
4. Stitch your cocktail dress together, following the directions for your specific pattern. Sew the bodice together at the shoulders and the skirt pieces together at the sides. Attach the sleeve pieces to the open armholes of the bodice, then sew the side seams of the bodice together. Stitch the skirt to the bodice at the waistband. Press and finish all seams, either by serging or zigzag sewing.
5. Add all detail work to the cocktail dress. Attach any flounces to the bottom of the skirt or the sleeve ends, and finish the collar of the dress. Hem the bottom of the skirt and the edges of the sleeves by either turning the hem under, pressing and stitching it in place, or by creating a rolled hem. Complete any beading, embroidery or ribbon detailing.


A Rally With The Best Dressed People


If you read my last post then you will understand this one. My last post talked about the "Schmatta: Rags To Riches To Rags". How many remember that it wasn't long after the premiere of the HBO special that designers decided to react. Designers of all standings, from top designers such as Michael Kors and Elie Tahari to young fashion workers and design students showed up to support what believe in.


It all took place at 39th Street and Seventh Avenue. Can you say LOCATION LOCATION LOCATION!!!!

The goal of the rally was to encourage government officials to protect the city's shrinking clothing production district. Designers came together as one big voice carrying signs bearing slogans such as "It's Sew New York" and "Save the Garment Center".


Some of the best were present to support the rally. There were even supporters who were not present such as Donna Karan, Betsey Johnson and Anna Sui.

Michael Kors, Elie Tahari and Nanette Lepore
Swimwear designer Malia Mills says "All of my swimwear is made here in the Garment Center."
Diane von Furstenberg and Yoehlee Teng
Nanette Lepore addressing the crowd


Kors, Lepore and Tahari

Rags to Riches to Rags

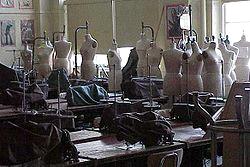
HBO's "Schmatta: Rags to Riches to Rags" is a must see eye opener. Emmy-winning filmmakers Marc Levin and Daphne Pinkerson takes us for a journey back to the historic rise to the recent decline of the once vigorous apparel manufacturing industry in the U.S, focusing on NYC.  In 1965, 95% of our clothing was made in the USA. In 2009, it was noted that only a poor 5% of our clothing is now made in the USA.  Why? Thanks to greed, outsourcing and a bunch of Wall Street idiots. How long will this 5% last here in the States???? 


Daphne Pinkerson and Marc Levin at "Schmatta: Rags To Riches To Rags" premiere in NY.


Sunday, May 15, 2011

Tisha and JICD

Latisha Winston is an entrepreneur who is in the developing stage of devising Joi Institute of Creative Design. JICD is being created to focus on the art of dress making incorporating every aspect of art. According to Winston, the Metropolitan Area (DC, MD &VA) does not have any programs that focus on the art of dress making and “its really a dying art.” She said “If you don’t live in New York then your pretty much out of luck for professional dress making classes and not everyone lives in New York.” She wants to appeal to all age groups and races but focusing on the younger (pre-teen) generation to get them involved at a young age and inspire American made designers.